|
|
|
|
|
|
|
|
|
|
|
|
|
|
|
|
|
|
|
|
|
|
|
|
|
|
|
|
|
 |
|
|
Concrete Countertops: Technical Details About ConcreteThe first step in the production of a concrete tops is to make a template of the cabinets or existing top. In this process, our mechanic makes a physical model to be sure that the new concrete countertop fits properly. There are cases when a template is not needed, for example if our cabinet division is making the cabinets that will go below the top. After templating, our next task is to make the molds for the tops (and sinks if they are part of the job). Mold making is a critical step because the shape of the mold dictates exactly the form of the countertops. For sinks, we can use one of our many existing molds, or we can create one made to the specifications of the job. 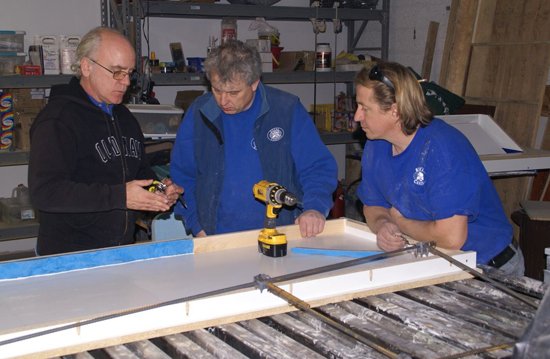 Figure 1 (above): Making a counter top mold with a 2 rock face edge. 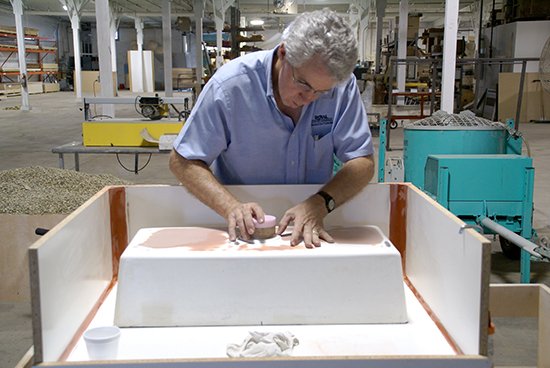
Figure 2 (above): Fabricating a mold for a custom farm sink with soft radiuses on front edge. 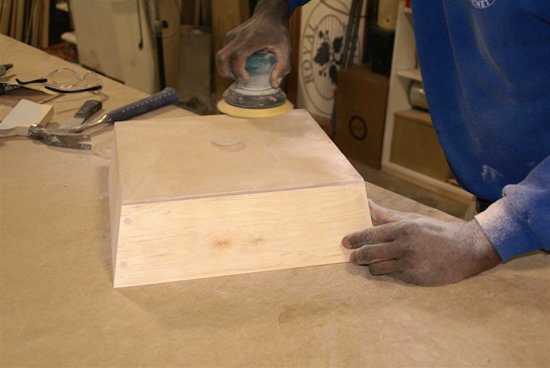 Figure 3 (above): Sanding a custom vessel sink mold. Once the mold is made, the next step is to add structural reinforcement needed to produce a top with high tensile strength. We typically use #3 rebar as primary reinforcement and depending on top thickness, we may use ladur wire cross ties. Secondary reinforcement like fiberglass scrim or carbon fiber webbing may be added to other areas needing more strength like faucets holes. 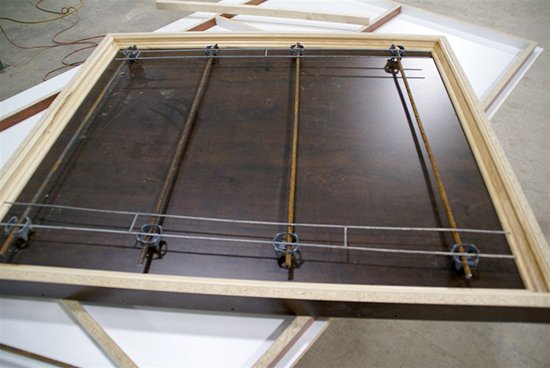
Figure 4 (above): Countertop mold with primary reinforcement in place 3/8 rebar and ladur wire. Once all the forms are ready, it is time to mix the concrete. Our mix designs are formulated to produce concrete with strengths in the 9,000-10,000 PSI range far greater than needed to withstand the rigors of everyday use. Our primary mix design is based on the ingredients pictured below. Each component is carefully weighed before blending in the mixer. Our mix formulas also include concrete admixtures that help the wet concrete consolidate (flow) better, allow air bubbles to escape, and accelerate the set time. 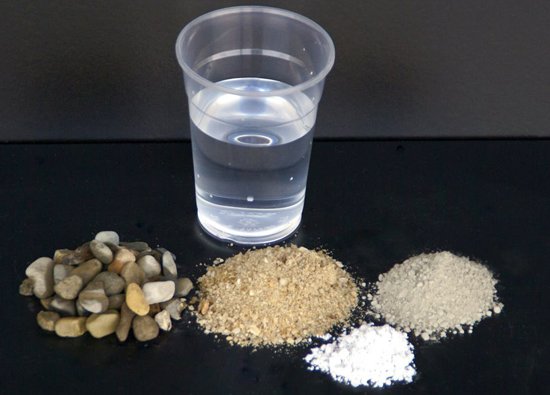 Figure 5 (above): Mix ingredients from left to right Delaware River pea gravel, water, sand, VCAS, and Portland cement. 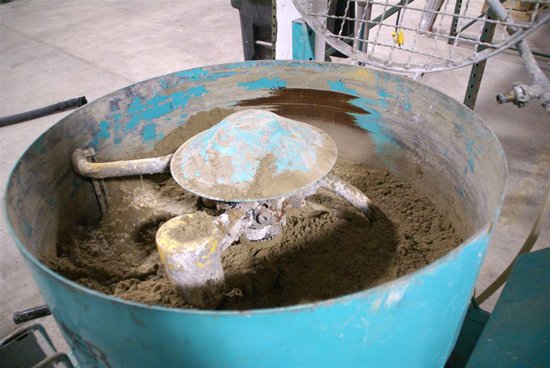
Figure 6 (above): Batch ingredients are carefully blended in an Imer vertical shaft mixer with free spinning trident paddles for thorough mixing. 
Figure 7 (above): Once mixed, the concrete is poured into the form and vibrated on our 4 x 8 lifting table. After pouring, the concrete is covered with a heating blanket and allowed to cure a day before removing the top or sink from the mold. Note some concrete top makers need to keep their products in the mold for a week or more, but we use a mix design and heated curing that produces a PSI rating of ~4,000 PSI within 24 hours. Less time in the mold means you get your new tops faster. The concrete comes out of the mold in a raw form. From this point, handwork takes over. Finishing steps include applying a slurry to fill in any bugholes (voids) followed by a series of grinding steps using increasingly fine diamond pads.  Figure 8 (above): Using compressed air to loosen the fiberglass sink mold. 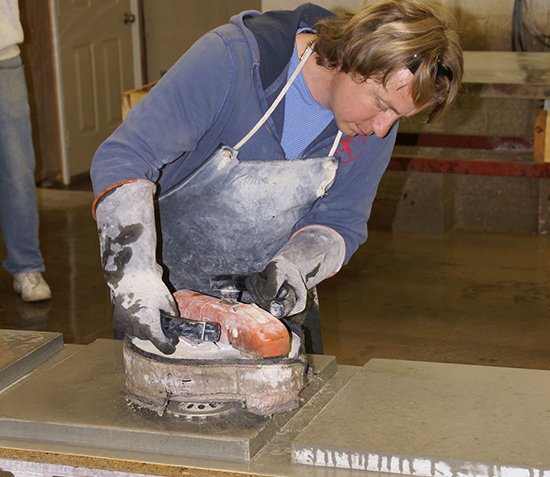
Figure 9 (above): Using a 3-head planetary grinder to wet grind color sample pieces. Once the grinding steps have produced a velvet surface, it is time to move the top to the finishing room for staining and sealing. 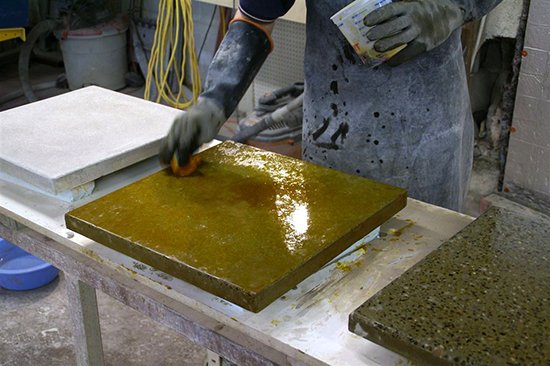
Figure 10 (above): Sponging on a reactive concrete stain. |
|
|
|
|
|
|||||||
|
|
 |
||||||
|
|
|
|
|
|
|
|
|
|
|
|
|
|
|
|
|
|
|
HOME |
WHY CONCRETE? |
ABOUT US |
KITCHEN GALLERY |
BATH GALLERY |
OTHER SPACES GALLERY |
OUTDOOR GALLERY |
|||||||